
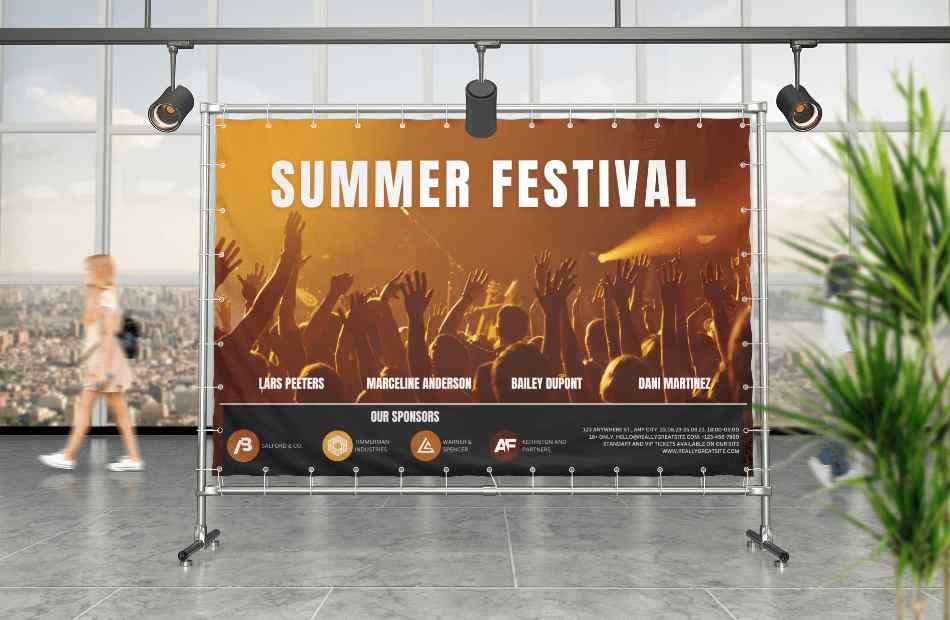
Temporary visual displays like hanging vinyl banners and oversized posters offer an economical, highly versatile way for organizations to announce events, manage crowds, highlight directional paths, or promote short-term initiatives. Whether set up inside a convention hall, mounted along a perimeter fence, or displayed on an easel in a facility lobby, temporary graphics deliver clear, high-impact communication without requiring permanent structural installation.
Achieving crisp, professional results requires careful consideration of graphic resolution, material thickness, wind loading physics, and hanging mechanisms. When evaluating tear resistance ratings, substrate weights, and edge finishing options for temporary graphics, reviewing technical guides detailing commercial banners posters from AlphaGraphics Hillsborough offers a practical benchmark for comparing vinyl weights, mesh airflow ratings, and display hardware styles. Taking time to select the right material and mounting technique prevents torn grommets, sagging displays, and unreadable graphics.
Step 1: Matching Substrates to Operating Environments
Selecting the right material substrate depends entirely on whether your display will hang indoors under controlled lighting or outdoors exposed to wind and rain.
Outdoor Banner Materials
- 13 oz. Heavy-Duty Vinyl: The industry standard for outdoor temporary displays. Features an internal polyester scrim mesh sandwiched between vinyl layers to provide high tear resistance against wind gusts.
- 18 oz. Blockout Vinyl: A heavier, denser material featuring an opaque inner layer that prevents light from passing through. Essential for double-sided banners where background sunlight would otherwise render text unreadable.
- Mesh Vinyl: Manufactured with thousands of tiny perforated holes that allow air to pass directly through the material. Mesh reduces wind resistance significantly, making it the preferred choice for large fence wraps, scaffolding, and elevated outdoor installations.
Indoor Poster Substrates
- Heavyweight Gloss / Matte Paper: Ideal for high-resolution graphics, indoor promotional posters, and photo displays placed inside snap frames or mounted on easels.
- Foam Core Board: Features a lightweight polystyrene foam center laminated between smooth paper faces. Rigid and self-supporting, making it great for presentation boards and trade show displays.
- Gatorfoam / PVC Board: Offers higher durability and moisture resistance than standard foam board, preventing warping when used repeatedly across multiple events.
Step 2: Designing High-Impact Layouts for Fast Reading
Passersby usually have only a few seconds to read a banner or poster. Clean, uncluttered design layout keeps your messaging legible from a distance.
Prioritizing Visual Hierarchy
- Single Focal Point: Keep messaging direct and focused. Emphasize a primary headline or main event title, followed by secondary details like dates, times, or location addresses.
- High Contrast Color Choices: Combine dark text with light backgrounds—such as navy blue or black lettering on a white or yellow background—to maximize visibility under varied lighting.
- Bold, Sans-Serif Fonts: Use clean, highly readable typefaces like Helvetica, Arial, or Futura for headlines. Avoid overly decorative script fonts or thin serif typefaces that become indistinct when viewed from fifty feet away.
Step 3: Essential Finishing Options for Added Strength
Proper edge finishing prevents tears and prolongs the usable lifespan of vinyl banners, especially when exposed to continuous wind load.
Edge Hemming Standards
- Heat-Welded Hems: Fuses the folded edges of the vinyl together using high heat, creating a reinforced double-thick border along the banner perimeter.
- Double-Stitched Hems: Uses heavy-duty industrial thread to secure the folded border, offering high strength for long-term outdoor installations.
Hardware and Grommet Placement
- Brass Grommets: Metal rings punched through the reinforced hemmed edges every 2 to 3 feet allow rope, bungee cords, or zip ties to secure the display without ripping the vinyl.
- Pole Pockets: Folded loops sewn or welded along the top and bottom edges of the banner that accommodate metal or PVC poles, ensuring the display hangs completely flat without edge curling.
Step 4: Safe Installation and Hanging Protocols
Using correct tensioning methods keeps banners taut and prevents wind from whipping the material, which is the primary cause of grommet failure.
Securing Outdoor Banners
- Use Bungee Balls or Bungee Cords: Secure banners to fences or posts using elastic bungee cords rather than rigid wire or zip ties. Bungees absorb wind shock loads, expanding and contracting to protect grommet holes from tearing out during heavy gusts.
- Avoid Over-Tightening: Pulling a banner too tight creates uneven stress on the corners, causing the face to wrinkle and weakening the grommet seats.
Displaying Indoor Event Posters
- Snap Frames: Aluminum wall frames with spring-loaded edges allow posters to be swapped out quickly while protecting edges from curling or tearing.
- Telescoping Banner Stands: Portable roll-up banner stands protect vinyl graphics inside an aluminum base during transit and pull up easily for quick event setups.
Step 5: Storage and Care Guidelines for Reusable Displays
Caring for temporary displays properly ensures they remain crisp and ready for future events.
- Never Fold Vinyl Banners: Folding vinyl causes permanent creases and can crack printed ink layers. Always roll banners tightly with the printed side facing outward around a cardboard core.
- Clean Before Storing: Wipe down vinyl graphics with a damp microfiber cloth to remove dirt, mud, or dust before storage. Ensure the display is completely dry to prevent mold or mildew growth inside storage bags.
- Store Flat or Vertical in Cool Conditions: Keep rolled banners and rigid poster boards in a temperature-controlled environment away from direct heat sources to prevent material warping.
Summary Checklist for Banner and Poster Setup
- [ ] Select Appropriate Substrates: Use mesh vinyl for high-wind fences, blockout vinyl for double-sided outdoor displays, and rigid boards for indoor posters.
- [ ] Keep Layouts Simple: Focus on high-contrast colors and bold typefaces for fast readability.
- [ ] Reinforce Banner Edges: Ensure outdoor banners feature heat-welded hems and brass grommets placed every 24 to 36 inches.
- [ ] Use Elastic Fasteners: Secure outdoor banners with bungee cords to absorb sudden wind gusts.
- [ ] Roll Graphics Printed-Side Out: Store vinyl displays rolled around a cardboard tube in a cool, dry place to prevent creasing.